UPDATE: Retronator, an amazing pixel artist, was kind enough to show how to take my ok-ish car sprite and really spruce it up. Check out his tutorial here
OK, I'm going to keep this quick and dirty (HTML 1.0!). Hi, I'm Louis and I suck at drawing. So what did I do? I went out and got a Hot Wheels car, photographed it, and traced over it in The GIMP. Here's a step by step guide to my process.
DISCLAIMER: I'm not saying this is the best, or even a great technique. But, after much time flailing around trying to draw freehand, even while glancing at a model, this method worked wonders for me. OK, here's what I did:
1.) Photograph the car with your phone
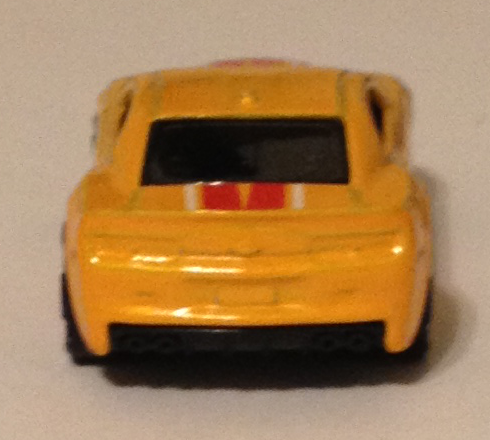
2.) Crop it, and doodle over it. I used big bold colors to indicate where
different parts of the car go. I also didn't color the body just one color,
because when I shrank it I was pretty sure I'd forget where some of the
differently-angled parts of the body belonged.

3.) Shrink it. Don't use any interpolation. Now you're starting to see why
I smeared solid colors all over the thing.
4.) Mark the halfway line so you get a better sense of symmetry. If I had to
do it over, though, I think I wouldn't bother-- I ended up cloning and flipping
one half of the car for symmetry because it was still too asymmetric for a
dead-on back view of the car. When the car is more angled to one side or
another, this is going to be less important. You can also see me starting
to outline different parts of the car and fill it in.
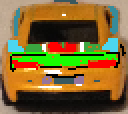
5.) More of the car is filled in. I start to play with checkerboard shading.
I'm trying to use all (approximately) EGA colors here. 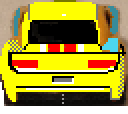
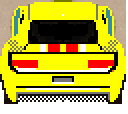
6.) Here's where I give up trying to do symmetry by hand and clone one side
instead. I also added a checkerboard shadow so that the road can show through
underneath the car a little.
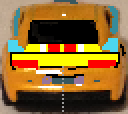
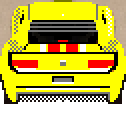
7.) I add more shading (such as the light glinting off the right side of
the car but not the left), added a center tail light, a little logo thingy
near the trunk, and some cool shade lines in the back window. This is really
helping it look less plain.
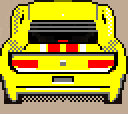
8.) I fill in the outline around the car and decide it needs a little more
shading around where the tail lights are, because on my toy car version it's
recessed. I've also worked out where the tires belong, and that took referring
back to the model a bit since that info got lost in the initial photo.
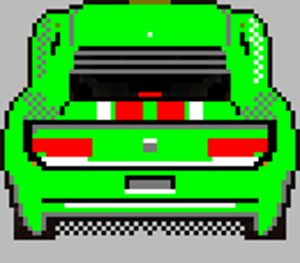
9.) Finally, I color in the car green.
I also cheated and made it 65 pixels up from the 64 it was before. An
alternative to that would be moving one half of the car inward to make the car
one pixel narrower. I'd then have to redo the size of some of the details in
the back to keep them symmetric.

OK, so it's done! It's not the most amazing car, but it was a technique that only required modest pixel art skill, and it's at least useable. A better artist would be able to make it look a bit less stiff, and I'm sure give it some neat touches that I haven't thought of. Also, I've stuck with EGA limitations, hence the limited shading and use of checkerboards.
What would I do differently? Well, I think for racing game purposes the camera is too high up. I also decided to go with the heavy black shadows ala Lotus and Jaguar on the Amiga. But I really do think a better pixel art practice, especially if you have more colors, is to try and make the outlines just a couple shades darker than the paint color instead of using heavy black outlines. But, of course, that's subjective. One perk of doing it this way is you can just palette swap one color to get different color cars on the road!
Cheers!
--Louis
P.S., please don't rip this graphic to use in your own game. Besides,
what fun is that? You can make a better car!! (c) 2015 Louis Gorenfeld, thx!